


Installation of acrylic baths with their hands: manual
Table of contents:
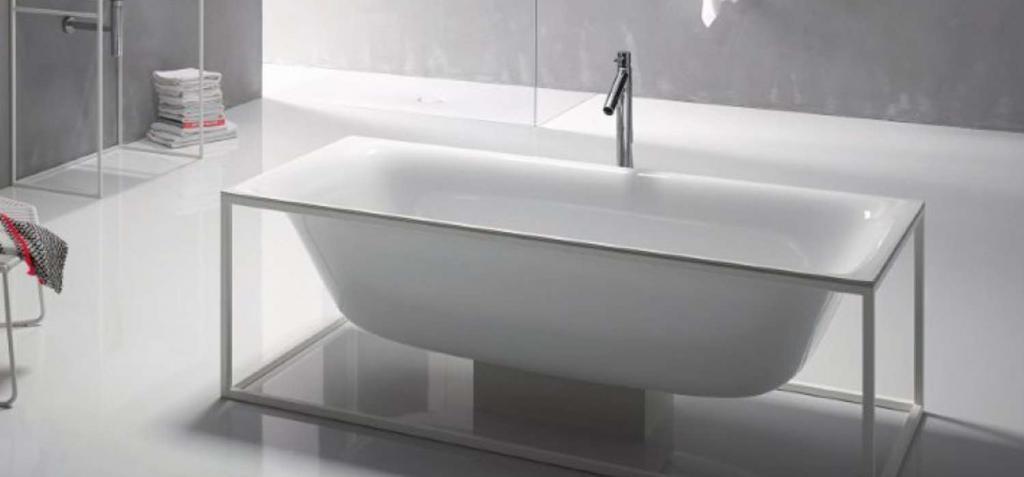
To Choose and buy the bath is only half the battle. The end result will depend on the quality of installation of the product. Proper installation will allow use of plumbing fixtures for a long period of time with maximum comfort. But if the installation is allowed even the slightest error, it could be the cause of failure. Sometimes it can be fixed with repair, but sometimes, incorrectly installed bath requires replacement.
Training
Instructions for installation of acrylic baths on the first stage involves the preparation of the premises. To do this, remove the old appliance, remove the drain and unclog the sewer pipe. There is inserted a section of corrugated hose. All joints treated with a sealant.
Paul recommended to align or to take care of this solely on the plot, bath. The water before the preparatory work it is recommended to disable, and after the completion, remove from the room the garbage. The place where it will be bath, should be covered with cushioning material to provide protection against damage. Experts recommend to buy bath directly before installation. Long-term storage of the product in inappropriate conditions may cause deformation of the material.
Security precautions
Installation instructions acrylic bath with your own hands provides safety. To perform work independently because the weight of the device low. However, this particular acrylic has a drawback. The material is rather fragile, so handle them carefully. Even if the product will fall from a small height, it can lead to cracking and chipping. The same result is possible if in the bowl to drop a heavy object. The surface of acrylic can get scratched if handled carelessly.
Recommended

The most effective methods of seed germination
Despite the fact that the method of seedling in vegetable production is a very time consuming process, it is used by most gardeners. Planting seeds in open ground is an easy and convenient method, but it is effective only in certain climatic zones. I...

Retro-reflective paint. The scope of
When the vehicle began to fill the road, their popularity began to gain reflective paint. Thanks to this paint, as drivers and pedestrians becomes much easier to avoid accidents in the dark. Purpose paint Reflective paint – paint material, whic...

How to make icon with your own hands - options izgotovleniya (simple and complex)
In Soviet times, many collecting badges, emblems, pennants. To get them was not easy. And today, thanks to technology, you can make them yourself. Knowing how to make icon with your own hands, and you can make original gifts to your friends, and make...

Before installing, you should examine the recommendations. They are attached to the product. The bottom must be attached to the frame or legs in places that specified by the manufacturer. If the position of the bath will change, it can lead to deformation or breakage.
Before installation of acrylic corner bath with their hands, take time to make sure good quality that has the product. It is necessary to look in the passport. Then move on to the inspection device. To do this, click on the wall. If they bend or the appliance produces an unpleasant smell, it is said that in the process of production was used poor quality acrylic. A bath is better to change to another.
Walls should not show through. To check this, you can use a flashlight. Make sure that in the scope of delivery includes everything needed to install. It is important to pay attention to the number of supports. The less you have, the stronger the product.
Installation Procedure
Installing acrylic baths with your own hands can be one of several technologies. One involves the use of legs as supports, while the other frame of brick. You can perform installation and on the factory frame with legs. To ensure maximum strength of the bath, some masters use a combined method of installation. The product, in this case rests on the legs and brick frame.
To Cope with the setting the easiest way, when, along with the design comes the frame or legs. But to work with the brick must possess certain skills, as the clutch will need to perform smoothly and accurately, complying with dimensions. No matter which method of installation was selected, you must provide access to communications. Easy enough to achieve this goal when mounted on a frame or legs. However, if there is masonry, you should leave a clearance of a few bricks to carry out the maintenance of communications.
Installing on legs

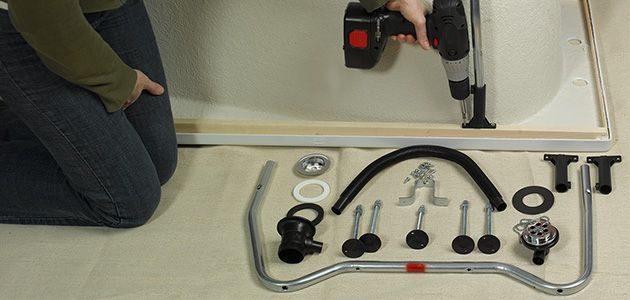
Setting acrylic tub on legs with their hands is conducted according to the following algorithm: first, the supports are installed in designated places for them. After the tub is mounted to its place, and the legs are height adjustable. The position of the sanitary appliance is fixed, then carried out finishing work. For screwing the legs on an inverted tub should find places for attachment. They will have holes or mounting pads. The legs are fixed in these places.
The installation to a platform, the legs must be installed on rails attached to the bottom of the room. The installation of acrylic bathtubs in the bathroom in no case should not be accompanied by drilling holes in other places on their own. This may cause deformation of the material, and the bowl in this case may turn over, because the place for the legs is selected based on load balancing.
Improperly installed supports empty tub can stand almost exactly, but if it is filling with water you can face cracks andleak. Once the legs are installed, the tub can be inverted and set on the supports. The bottom was covered with a soft material so as not to Mar the surface.
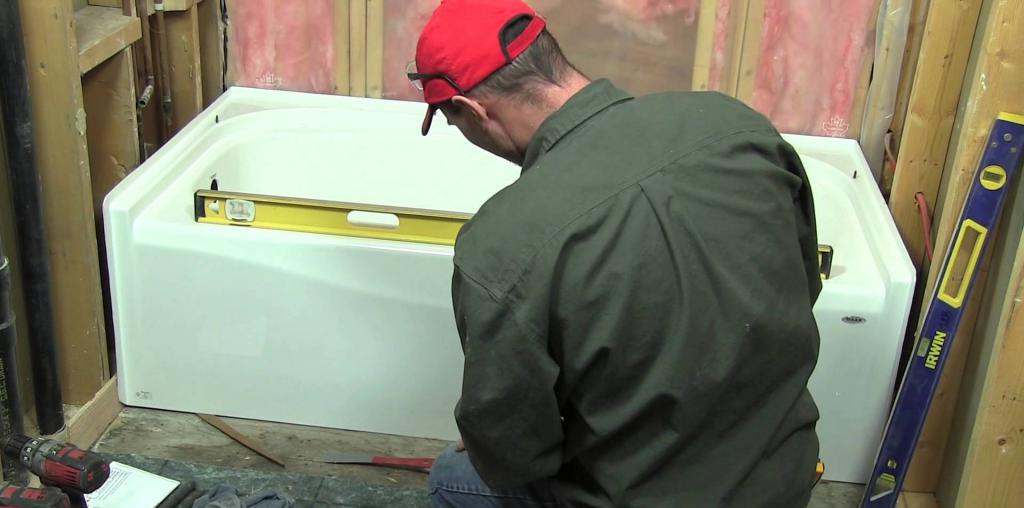
The next step allows you to adjust the legs. You must first align the position of the parties in contact with the wall. After being adjusted the position of the outer sides. To adjust, you can use a building level, a screwdriver and a set of keys. Installing acrylic baths at this stage is as follows: one corner should be raised to the desired height by the method of rotation of the screw legs. The level is placed on a nearby corner, and the aligned position. On the same principle it is necessary to adjust the location of the remaining corners. If there are any errors they must be corrected.
If the bathroom is already tiled with ceramic tiles, the process of adjustment can be complicated. In this case you will have to adjust the height of the rim, to coincide with the bottom edge of the trim. Experts advise to first install a tub and only after to start decorating. Installing acrylic baths sometimes carried out with a slight slope towards the drain. To do this, the height of the legs varies with the difference of 2 cm, However, most often, the bias is provided in the design to manufacturers. The next stage is connection of Sewerage and water supply.
Additional work
Since acrylic tubs do not retain heat too well, the experts recommend to put a layer of insulation. To do this, use foam. Tub turns, its outer surface is wetted by water, and after the base is processed foam. The material is fed in a thin stream so that the foam does not slip laterally when dry.
Such processing is conducted after the position of the frame and the legs adjusted. The legs also need to saponite to strengthen them. Once the insulation layer is applied, the plumbing device is left for 8 hours to dry. After that, the tub is inverted and set in place. You can close it with a decorative screen or separate in any way.
Installing on a frame
The Installation of acrylic baths on a frame with their hands almost indistinguishable from the mounting legs. However, the amount of work will be more. The frame elements at the first stage you should unpack and then turn the bowl upside down. Now you can markup the outside of the bottom, marking the attachment of the frame elements.
For fasteners drilled holes, bolted to the bottom bracket. It is necessary to attach legs and other elements. After the upper and lower drain openings are connected, you can collect the siphon. All connections are sealed. Bath turned over and installed in its place. Its aligned position, and the horizontal level is checked.
On the wall please identify places for installing hooks to avoid turning bowls. For fastening bore holes, then you are ready to install the hooks. Bath hung on them, and the position is checked with a level. Installation of acrylic baths on a frame ends connecting the siphon to the drain pipe. Then all joints should be checked. Tub is filled with water, and after a while you will be able to see the connection. If you had discovered a leak, the problem is treated with sealant.
About the features of drilling
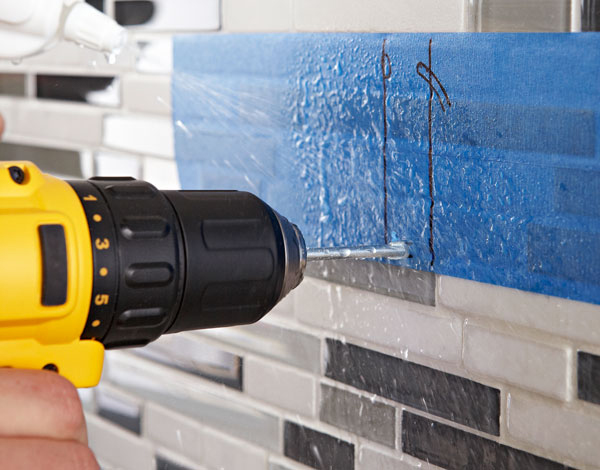
When drilling the housing, be careful. You need to go to 6mm, otherwise you can make a hole in the hull. Specialists wound on a drill bit electrical tape to mark the depth to which it will be located in the thickness of the material. On the body needs to be set screws, for mounting them there are places where the thickness of the acrylic more than the steel casing.
The fixings supplied with the frame, replace is not recommended. Their sizes are chosen so as not to spoil the surface of the bowl. Fasteners can be replaced with items matching fasteners supplied by the manufacturer. To tighten the fasteners using a screwdriver. From the use of the screwdriver should be abandoned, as this may cause cross-threading of a screw.
Installing on masonry

The Installation of acrylic baths on the bricks is done more often if you want to implement custom design solutions. These supports may be used under certain features of the room. Sometimes the tub comes and does without a frame to reduce the cost of the buyer. But the use of bricks allows to achieve greater strength.
The Design will be ready to serve for many years, and its creation will take longer time than the installation of the factory frame. For the manufacture of foundations should be used:
- Metal profile;
- Solution;
- Bricks;
- Screws;
- Trowel;
- Hammer;
- Sealant.
The Frame is formed as follows: the position of the lower edge of the rim of the bowl it is necessary to mark on the wall. The marking drill few holes to install fasteners. Metal profile can be fixed at the next stage. On the floor marked the place wherewill be brick Foundation. The markup is laying. Once the solution dries up, you can install the tub. The next step is to connect the communication and treatment of joints with sealant. Installing acrylic baths provides for the verification of correct installation and tightness of connections.
How to avoid errors
The Metal profile is located on the bottom level, is used to improve the reliability of the Foundation. Step from the location of the profile to the floor should be 0.6 m. to Do this value is no longer worth it. Brick base can be formed in the form of two pillars or rectangular frame. It is important to maintain the same distance from the brick pillars to the ends of the sanitary appliance, the location of the drain must remain free.
Installing acrylic baths could involve the use of a rectangular frame. If you decide to use this technology, it is necessary to take care of the hole. It will ensure access to communications. The difference in height, if necessary, give the tub a bias towards the drain to provide a method of laying between the bricks of the metal plate. Its width should be 1 see If you have the experience to make a difference you can, placing more solution.
Features of the unit corner baths
Before the installation you must prepare the wall. They should form a right angle. To carry out the work necessary at the stage of rough finishing, when the base is aligned with putty and plaster. Compliance corner the standard verified by construction of a triangle.
Installing acrylic baths with their hands it is better to do before facing walls. Before carrying out major works you will need to dismantle the old tank and to shut off the water supply. It is important to follow a certain sequence. It involves disconnecting the device from the sewers. After that mono to disable the drain. The old tub must be taken out of the room, and the drain hole need to wipe and close the cloth.
Then formed a base. The best material for this is a brick. Before full drying of a solution it is necessary to leave the supports 12 h. Install the corner acrylic tubs is conducted in such a way that the device is firmly pressed against the wall. It is important to provide access to the pipes. Before mounting the angle of the walls should be aligned. The need for this is only possible where you will install new plumbing fixtures. The alignment still needs to be studied and gender.
It is Important to remember about the necessity to remove debris. If you still can't decide whether or not to provide the inclination, we can heed the advice. Some provide it. As practice shows, the catastrophic consequences if this should arise. In addition, the bath will always remain dry. If you are mounting with the legs, to give a certain angle with clamps.
Article in other languages:
KK: https://www.tostpost.com/kk/domashniy-uyut/8971-ornatu-akril-vannalar-z-oldarymen-n-s-auly.html
TR: https://www.tostpost.com/tr/domashniy-uyut/8975-y-kleme-akrilik-banyo-elleriyle-deyim.html

Alin Trodden - author of the article, editor
"Hi, I'm Alin Trodden. I write texts, read books, and look for impressions. And I'm not bad at telling you about it. I am always happy to participate in interesting projects."
Related News

Rosebuddy pelargonium: description and care
Amazing elegant beauty features a group of zonal geraniums, named rosebudding. Graceful flowers of culture, gathered in the lush blossoms, so like half a small spray roses that this similarity was the basis for such an unusual nam...

the Gardeners grow beautiful, exotic plants. They are able to decorate any interior, to make it more original and nicer. One such plant is potted Jasmine. How to grow a flower, will be considered later. appearance Speaking of Jasm...

Bartzilla - peony, conquer the world
Peonies are long lived on our land and in gardens. Forgotten are the days when they were considered “old” flowers of similar color. Now access the different variations of the peony, up to having the original kaktusovod...

Pulse counter: the purpose and use of
In the workplace, where there are a line of automation, there is always a need to calculate something. It could be a number of products, length of material, the execution of any process, machine operation or action of a particular...

How to pinch back cucumbers to get a rich harvest
every year as soon as the snow begins to melt, experienced and novice gardeners buy seeds, ready to gather a rich harvest. Growing cucumbers is not a complicated procedure, but still requires some care. To piece for the season the...

USHP-the Foundation with his own hands. USHP-Foundation: reviews
the Construction of any building is impossible without the construction of the Foundation. This is the basis of any construction, which ensures reliability and durability. There are quite a variety of types of Foundation. Modern c...
Comments (0)
This article has no comment, be the first!